If you’re an avid caravan or motorhome owner, you know that winterizing your vehicle is an essential part of protecting it from the harsh winter weather. However, once spring rolls around, it’s time to start thinking about dewinterizing your caravan or motorhome to get it ready for another season of adventure.
Dewinterizing your caravan or motorhome involves reversing the steps you took to winterize it, such as flushing out the antifreeze, checking the battery, and inspecting the water system. By following a few simple steps, you can ensure that your vehicle is in top condition and ready for your next camping trip.
In this article, we will provide you with a comprehensive guide on how to dewinterize your caravan or motorhome. We will cover all the essential steps you need to take to get your vehicle ready for the upcoming camping season.
Whether you’re a seasoned caravan or motorhome owner or a first-time buyer, our guide will provide you with all the information you need to get your vehicle ready for your next adventure.
Inspecting the Exterior

Before diving into more intensive RV spring maintenance, visually inspect the outside of your RV for any damages, leaks or cracks. This will help you identify any potential issues that need to be addressed before hitting the road.
Checking Tires
Start by checking the tire pressure and tread depth. Make sure the tires are properly inflated and have enough tread to ensure safe driving. Check for any signs of cracking, bulging, or other damage. If you notice any issues, it’s best to replace the tires before heading out on your next adventure.
Inspecting the Roof
Inspect the roof for any signs of damage or wear and tear. Check for any cracks, tears, or punctures in the roof membrane. Make sure all vents and skylights are properly sealed and not cracked or damaged. If you notice any issues, it’s best to have them repaired before they turn into bigger problems.
Examining Seals and Gaskets
Check all seals and gaskets around windows, doors, and compartments. Make sure they are not cracked or damaged and are properly sealed. If you notice any issues, it’s best to replace them before they start leaking and causing water damage.
Testing Lights
Test all exterior lights, including headlights, taillights, brake lights, and turn signals. Make sure they are all working properly and replace any bulbs that are burnt out. This will ensure safe driving and help you avoid any potential accidents on the road.
Checking the Interior

Now that you have checked the exterior of your caravan or motorhome, it’s time to move inside and check the interior. This step is essential to ensure that everything is in working order before you hit the road. Here are some sub-sections to help you with the process:
Testing Appliances
Start by testing all the appliances in your caravan or motorhome. Turn on the refrigerator, stove, oven, microwave, air conditioner, and any other appliances you have. Make sure they are all functioning correctly and that there are no leaks or strange noises.
Flushing Water System
Next, it’s time to flush the water system. Start by turning on the water pump and running water through all the faucets, including the shower and toilet. Check for any leaks or strange odours. If you used antifreeze during the winterization process, make sure to flush it out thoroughly.
Inspecting Batteries
Check the batteries in your caravan or motorhome. Make sure they are fully charged and that the terminals are clean and free from corrosion. If you notice any issues, replace the batteries before hitting the road.
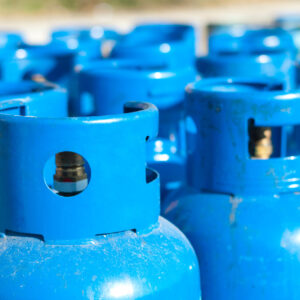
Checking Propane System
Finally, check the propane system. Turn on the propane and test all the appliances that use it, including the stove and heater. Look for any leaks or strange smells. If you notice any issues, have a professional inspect and repair the system before using it.
By following these steps, you can ensure that the interior of your caravan or motorhome is ready for your next adventure. Remember to take your time and be thorough to avoid any issues on the road.
Section 4: Testing the Engine
Testing your caravan or motorhome’s engine is an essential part of the dewinterization process. This section will cover the steps you need to take to ensure your engine is ready for the road.
Checking Fluid Levels
The first step in testing your engine is to check all fluid levels. This includes engine oil, transmission fluid, brake fluid, power steering fluid, and windshield washer fluid.
Make sure each fluid level is at the appropriate level before starting the engine. Refer to your owner’s manual for specific instructions on how to check fluid levels and add fluids if necessary.
Testing Battery
Next, test your caravan or motorhome’s battery to ensure it has enough power to start the engine. Use a voltmeter to check the battery’s voltage. If the voltage is below 12.4 volts, the battery may need to be charged or replaced. Check the battery terminals for corrosion and clean them if necessary.
Inspecting Belts and Hoses
Inspect all belts and hoses for cracks, leaks, or other signs of wear and tear. Replace any belts or hoses that appear damaged or worn. Make sure all belts are properly tensioned and aligned. Refer to your owner’s manual for specific instructions on how to inspect and replace belts and hoses.
Testing Brakes
Finally, test your caravan or motorhome’s brakes to make sure they are working properly. Start by testing the emergency brake. Make sure it holds the vehicle in place when engaged. Then, test the regular brakes.
Take the vehicle for a short drive and apply the brakes gently to make sure they are responsive. If you notice any issues, such as grinding or squeaking, take your vehicle to a professional mechanic for further inspection.